Microsoft 2007 introduced Ribbon features but the newly launched Office 2013 took it a step further. Now you can create a custom tab with group of commands in the Ribbon. Grouping commands in a custom tab improves productivity and makes it easier for document creation. In this post we will let you know how to create custom tab in Office 2013.
 Easy Steps to Create New Custom Tab in Office 2013:
- Right Click on the Ribbon and select ‘Customize the Ribbon’
- The Customize Ribbon window on the Word Options dialog box opens up. Click ‘New’ Tab at the bottom the list of Ribbons listed in the right of the dialog box.
- Right click on the ‘New’ Tab and select ‘Rename’ from the popup menu
- On the Rename dialog box, enter a name in the Display name edit box and click ‘Ok’
- When the New Tab is created, automatically a New Group is also added. Rename it similarly.
- Select an icon from the Symbol box to represent the New Group when the Ribbon is resized
- Move the tab to a different position on the Ribbon by selecting the tab to be moved and clicking either the up arrow button or down arrow button in the dialog box
- To add a command to the group on your tab, select a list of commands on the left. Filter the commands from the drop down list of ‘Choose Commands from’
- Add commands by selecting the group, then selecting the command and clicking ‘Add’.
- After adding all the commands and groups, click ‘Ok’ to save the changes made and close the Windows Option dialog box.
New Customizations to Play with Your Custom Tabs:
- Backup Your Custom Tabs in Office 2013: To backup your customizations, right-click on the Ribbon again and select ‘Customize the Ribbon’.
- Export Custom Tabs in Office 2013: Right click ‘Import/ Export’ and select ‘Export all customizations’, at the bottom of the Customize Ribbon screen on the Word Options dialog box.
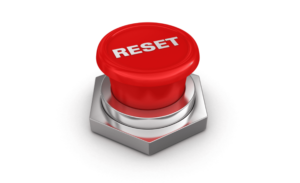
- Reset Custom Tabs in Office 2013: If you wish to reset any custom tabs you’ve added, you can reset all your customizations by clicking ‘Reset’ and selecting ‘Reset all customizations’.
- Reset in-built Tabs in Office 2013: If you only want to reset changes on one built-in tab (not on custom tabs), select the tab to be reset, click ‘Reset’ and select ‘Reset only selected Ribbon’ tab.
- Remove Custom Tabs in Office 2013: Select the custom tab you had created and click ‘Remove’